
Techline Connect — GM’s latest tool that brings together diagnostic information and vehicle data in one easy-to-use application — is currently being rolled out by state to GM dealerships (U.S.). The rollout to dealerships in Canada will begin later in 2019.
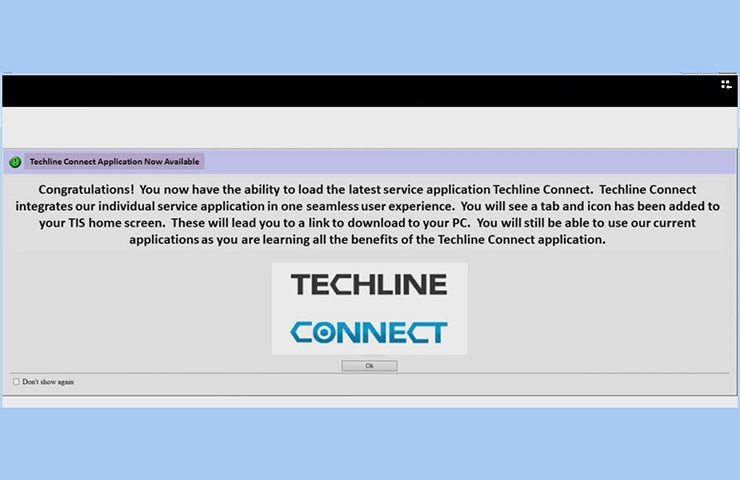
When the application is available in your dealership, a dialog box will appear when launching TIS2Web. (Fig. 1)
To ensure a smooth installation as well as to be ready to use the system right away, keep the following guidelines in mind.
Operating System Recommendations
Computer system recommendations for dealerships to ensure proper performance of the application include:
* Display: 15-inch high definition (HD) display
* Hard Drive: 500+ GB
* System Memory (RAM): 8GB
* Processor: Intel Core i7 5th Gen
* Operating System: Windows 10 Professional, 64 bit
Check the latest version of the GM Dealer Infrastructure Guidelines (DIG) for all required specifications.
Installation
Most dealerships will need approximately 30 minutes to complete the full Techline Connect installation. The dealership’s system administrator should be available to assist with any network security restrictions or settings.
Techline Connect will install components to the local personal computer (PC), including Java and the application.
A Techline Connect User Guide also is included in the application download. It includes installation instructions and an overview of the application.
Getting Started
Techline Connect can be installed on a new PC as well as one that already uses TIS2Web and GDS 2.
To get started:
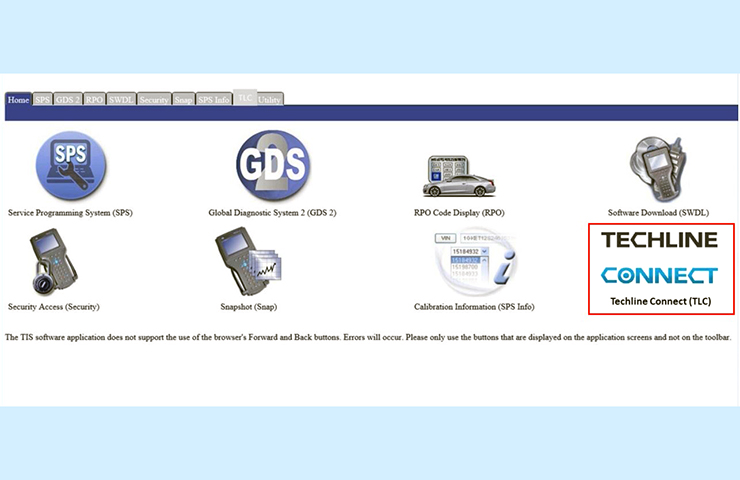
* Log in to the TIS2Web main page using your GlobalConnect ID and password. Select the Techline Connect icon. (Fig. 2)
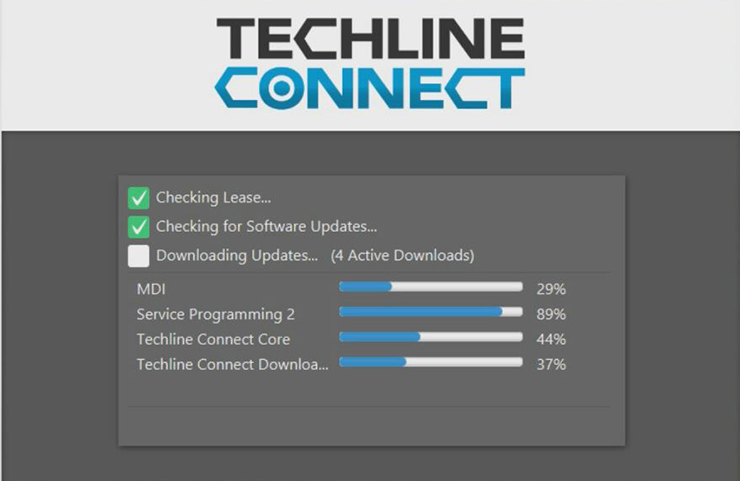
* Select the Start TLC Download button. The download will install a Download Manager on the PC. The Download Manager will automatically download components such as GDS 2 application and data, large calibration files, MDI updates and other applications as well as updates to these applications, based on the version already installed on the PC. It also will automatically check for valid application leases and renew leases if necessary. Any updates to the application will download and install automatically. (Fig. 3)
* On the initial installation of Techline Connect, the GDS 2 Diagnostic Package must be installed. The installation is done through the Manage Diagnostic Package function in GDS 2. When installing, answer “Yes” to keep previous GDS 2 sessions.
* On new PCs, MDI Setup will need to be completed. The MDI software components are included in the Techline Connect download. On currently used PCs, the existing MDI setup will be used.
All applications will need to be set up to allow third party downloads in order for the latest updates to be downloaded and installed to keep all applications up to date.
Launching Techline Connect
Techline Connect manages the MDI connection as well as the vehicle connection, providing access to diagnostic data and vehicle information.
To launch the app:
* Click the icon to launch Techine Connect.
* Connect the MDI/VCI and establish the device connection.
* With the MDI/VCI connected to the vehicle, select MDI from the MDI Explorer when prompted.
When a connection is established, Techline Connect will automatically connect to the vehicle and retrieve the VIN. The VIN and connection status are shown at the top of the dashboard. In addition, Investigate Vehicle History (IVH) information, Field Actions and Warranty History for the vehicle are automatically displayed.
From the Techline Connect Dashboard, users can access GM diagnostic applications, Service Information, and other functions in multiple panels or windows. (Fig. 4)
