After accessing to MB Star SDS system (i.e best sdconnect c4 plus) and through videmo or DTS Monaco, you can perform some change / disable / enable jobs.
This article will include the following contents:
1. Mercedes Star Diagnostic menu system
2.Functions performed by more than one control unit
3.Control Unit Group
4.Diagnostic of Internal Systems
5.Entry of Order Data
LOWERING THE VEHICLE
Entry Beep Disable
Allow the fan to turn on earlier to cool the engine/supercharger
Activate Remaining fuel display in Instrument Cluster
KeyLess Go Key reminder off
Misc. Settings
TeleAid Delete
To enable cornering lights
To enable tank content remaining (gallons left)
To enable flashing brake lights on emergency braking (missing on my SAM)
Enable Date in the Cluster (I’ve yet to do this one)
Change Speed limiter
R230 Disable TPC Tire pressure monitor STAR
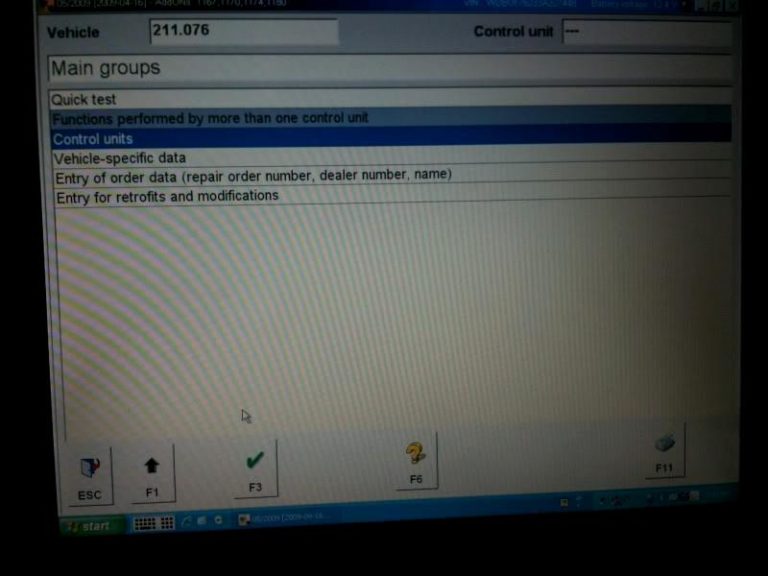
Mercedes star diagnostics menu system. Xentry Version 9/2015
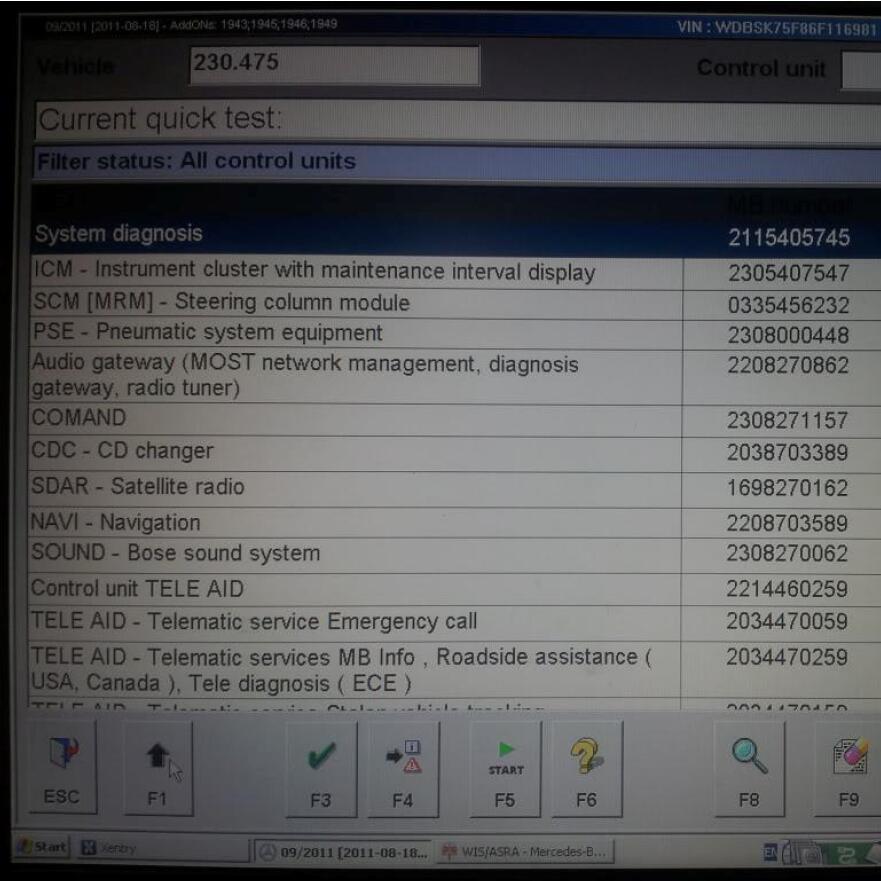
1.Quick test
2.Functions performed by more then 1 control unit.
3.Control Units
4.Diagnosis of the internal systems
5.Entry of order data (Repair order/dealer information)
6.Entry of retrofits and modifications.
*************************************************************************************
1.Quick test (checks the following systems.) Runs them all in sequence. Not Individually.
ECU
Can Bus Config
CGW
EZS
ME_SFI 2.8 Motor Electronics
ETC Electronic Transmission Control
ESM Electronic Selector Module
SBC
ESP
ABC Active Body Control
TPC
AB Air Bags
Driver side SAM
Passenger side SAM
Rear SAM
Head light control L/R
Door and seat control L/R
********************************************************************************
2.Functions performed by more than one control unit.
* Power Generation
1). Engine Management
2). Control Units in Engine Compartment
3). Engine Compartment CAN BUS Test
* Power Transmission
1). Transmission Control
2). Shift Lock
* Chassis/ Chassis
1). Brake System
2). Steering System
* Body Systems
1). Door
2). Glazing
3). Passive Safety
4). Interior Equipment
5). Seats
6). Climate Control
* Communication Information
1). Warning and Control
2). Communications
*****************************************************************************
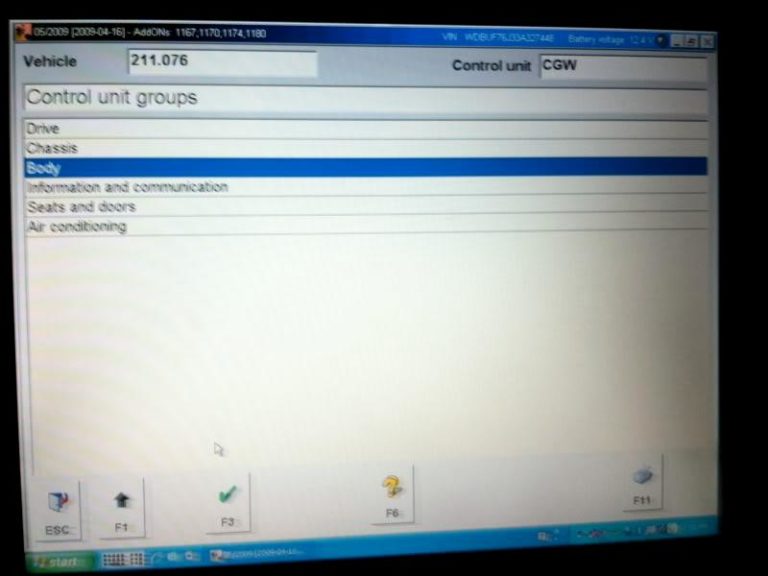
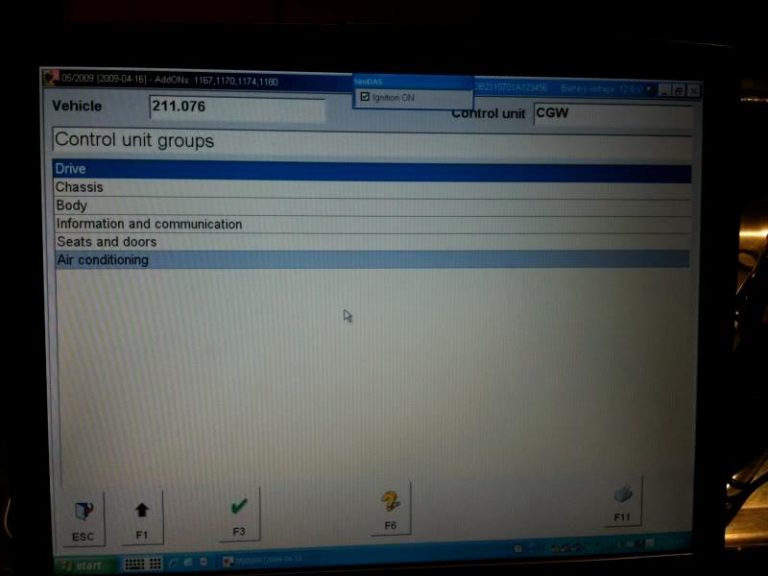
3.Control Unit Group
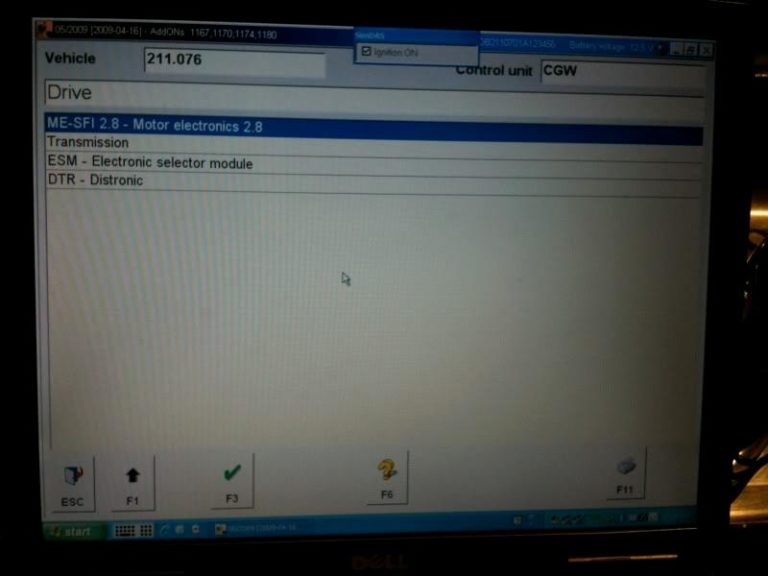
* Drive
1). Transmission
2). ESM
3). DTR
4). ME_SFI 2.8 Motor Electronics
Chassis
1). SBC
2). ESP
3). ABC
4). TPC
Body
1). AB Air Bags
2). WSS
3). CGW
4). BNS
5). OCP
6). EZS
7). HRA FR
8). HRA FL
9). LCP
10). PSE
11). Drivers Side SAM
12). Passenger Side SAM
13). Rear SAM
14). RVC
15). Keyless go
* Info and Communications
1). ICM Instrument Cluster Module
2). SCM Steering Column
3). PTS Parktronic System
4). Audio, Video, Nav and Telematics
* Seats and Doors
1). Door Control Module L/R
2). Seat Control Module L/R
* Air Conditioning
1). AAC Automatic A/C
2). STH Stationary Heater
3). HSW Heated Steering Wheel
***********************************************************************************
4.Diagnostic of Internal Systems
1). ECU
2). Driver Side SAM
3). Passenger Side SAM
4). REAR SAM
5). Pneumatic System
6). Lower Control unit
7). Upper Control Unit
8). Door and Seat Modules
9). A/C
10). Instrument Cluster
11). Power Supply Control Module
**********************************************************************************
5.Entry of Order Data
1). Enter repair order number. Garage/Dealer Information. (Not used for stand-alone SDS)
**********************************************************************************
6.Entry for Retrofit / Modifications
1). Brings up a display in German. No submenus. (Not sure of purpose or usage)
LOWERING THE VEHICLE:
1) Start your car, hit the raise button, wait 2 min, hit the raise (lower) button again to settle your car.
2) When you go into your Initial Setup Screen, have your computer outside your car with wires running
through your open window. You probably don’t have a Romess meter, but you can quickly measure the
front wheels and rear wheels to make sure they are at matching height or close as possible while pressing
(+/-) raising/lowering your car by each wheel. I measured from ground to fender. It really doesn’t matter
if your lowest or highest at this point, just make sure your fronts and your rears are close as possible from
left to right.
3) Then press F2 when you within the listed specs and enter your Angles: i.e. 3.2 Front and -1.2 Rear
worked great on my CLS55. This set my height at 26.25″ front and 26.5″ rear.
4) Exit out of the DAS, disconnect cables.
5) Turn off your ign switch and remove key. Then turn your car back on, and follow Step 1. Your settings will
take place as long as your car’s initial angles were in spec.
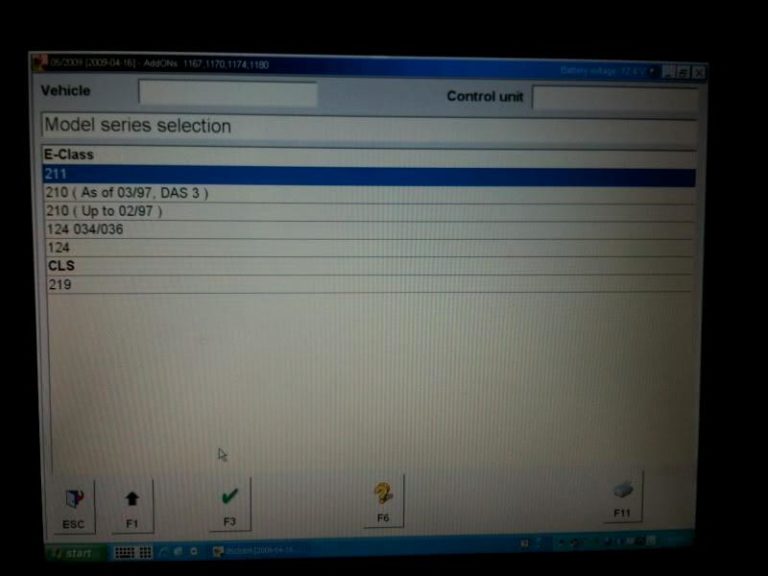
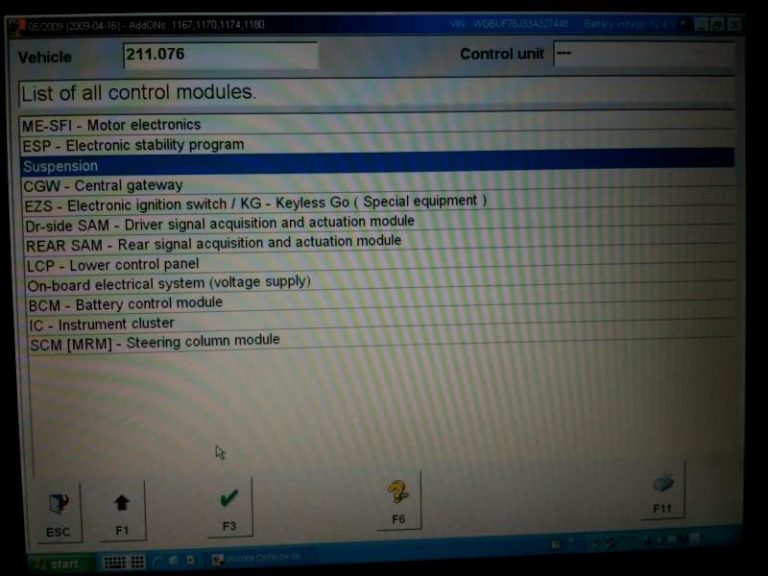
6) Get to the 211 Section
7) You will get to the main menu
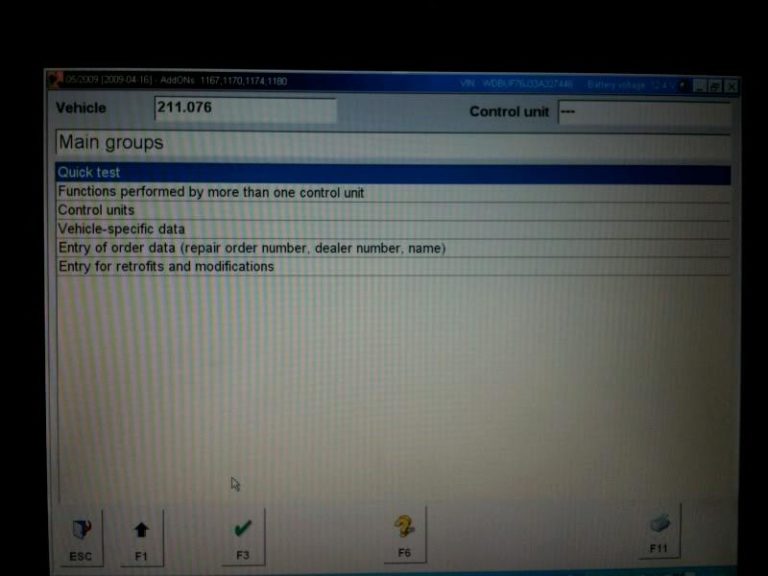
8) Then go to Func perf by more than…
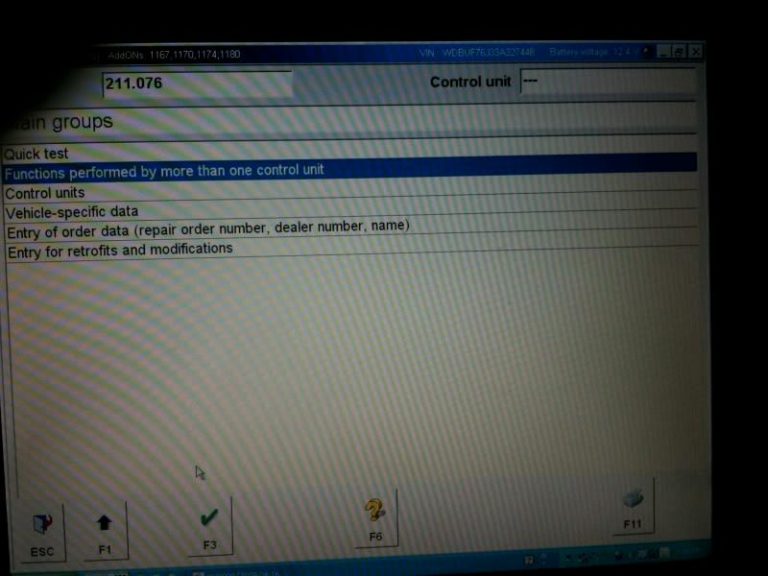
9) Then Chassis
10)Then Level adj

11)Then Suspension
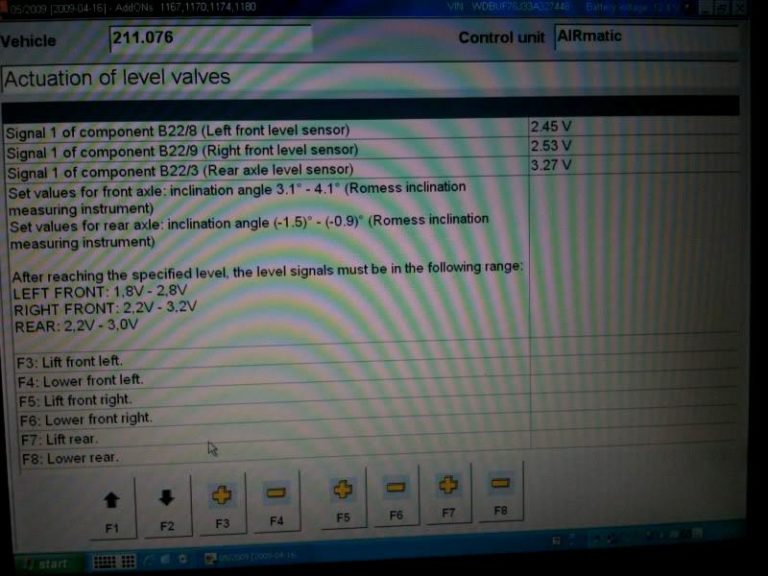
12)And here is where people have problems, they just go to actuations and then lower it, IT WILL NOT STAY
LOWER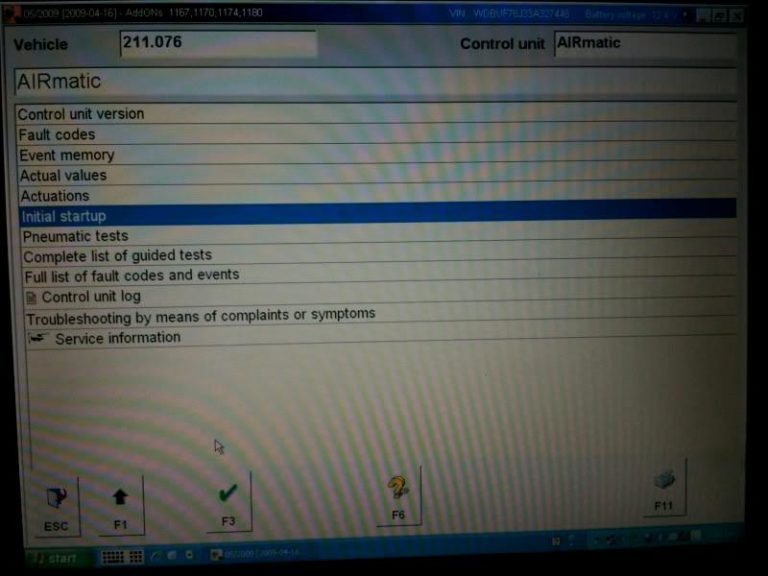 ED this way, you have to go to “initial startup”.
13)Then Initial with manual settings.
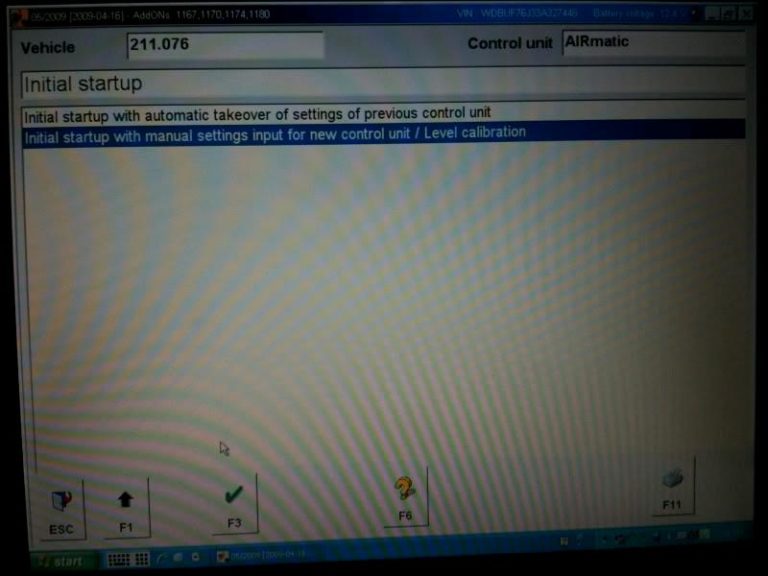
14)Then F2
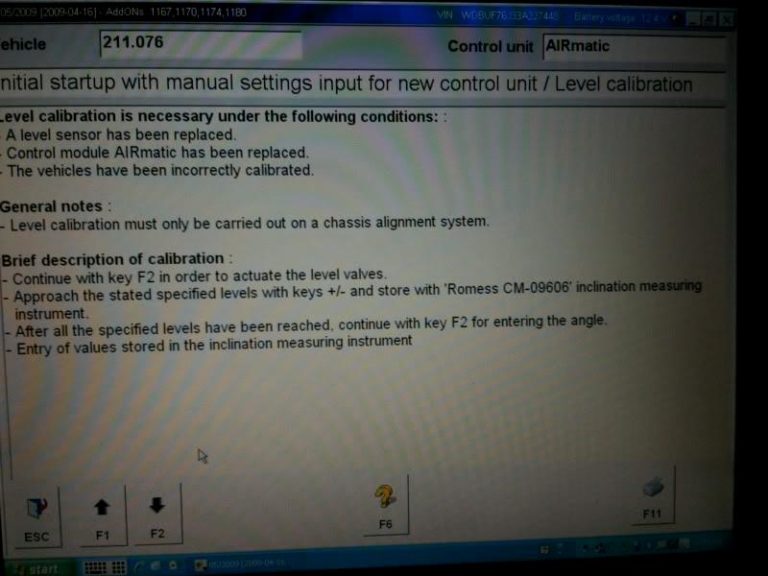
15)Here you will see a screen that shows the voltages which correspond to the height of the vehicle. They
must be within the given ranges in the left hand column. Use the + and – buttons to lower the car.
(In my screenshot I am in the car with a friend in the back seat, so that is why it is at 3.27, it should not
exceed 3), then hit F2
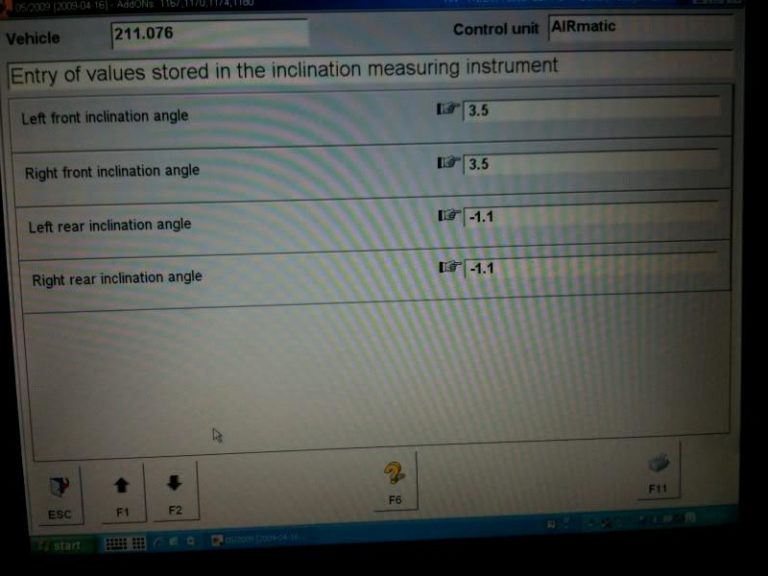
16)Enter in these inclination angles and if the car is within the voltages supplied in the page before, the car
will accept the new lowered setting, if not it will reject it.
Entry Beep Disable:
1) Now, how to activate the unlock and lock beep (honestly, one of the best mods to do if you have an older
model e55)
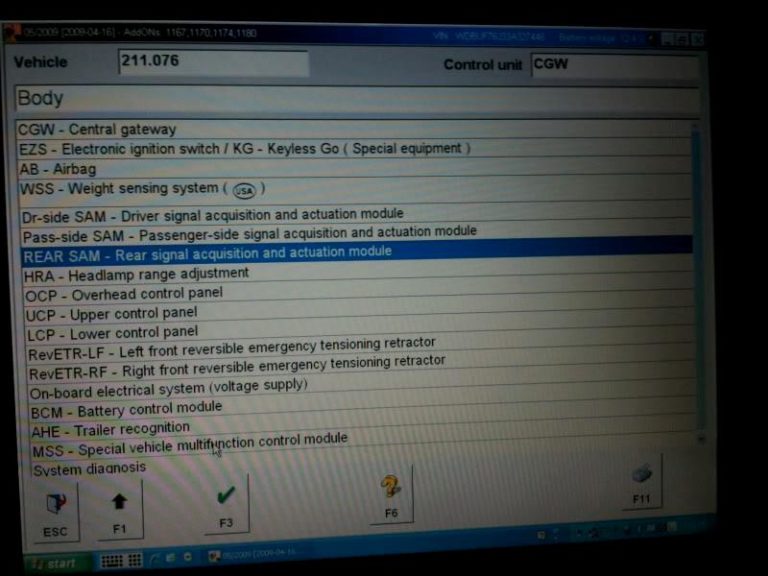
First Control units:
2) Then Body
3) Then rear SAM
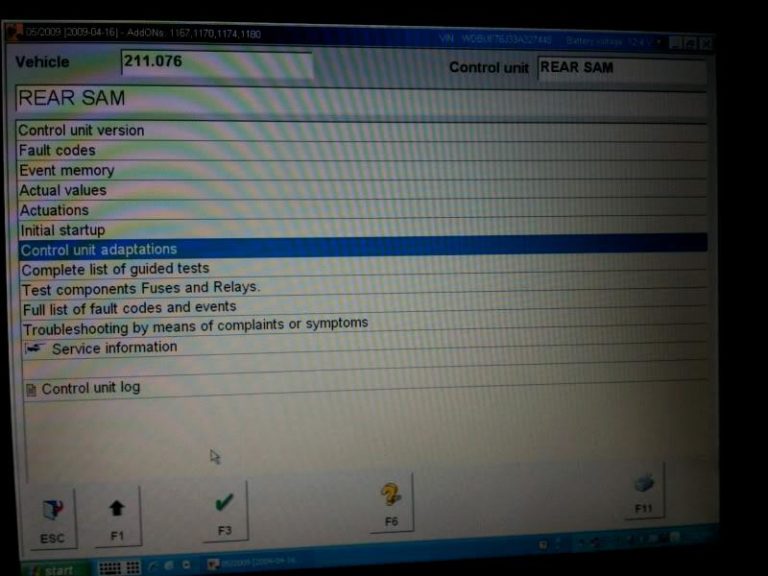
4) Then Control unit adaptations
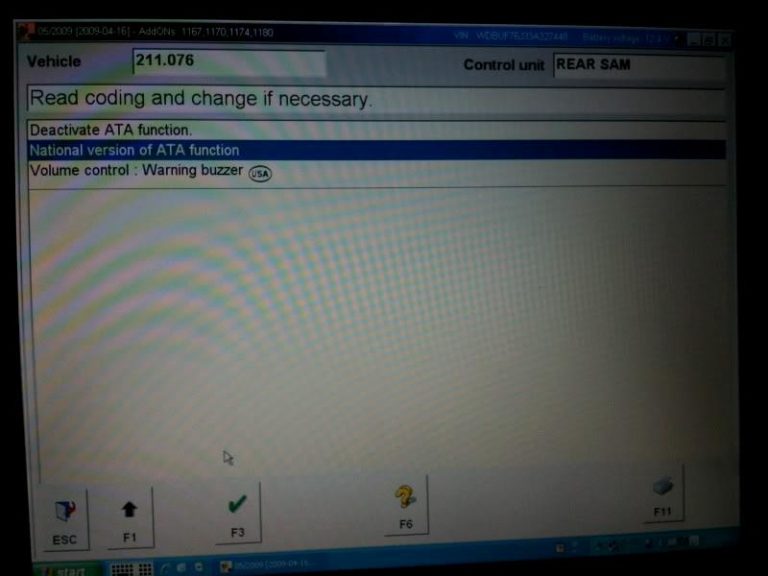
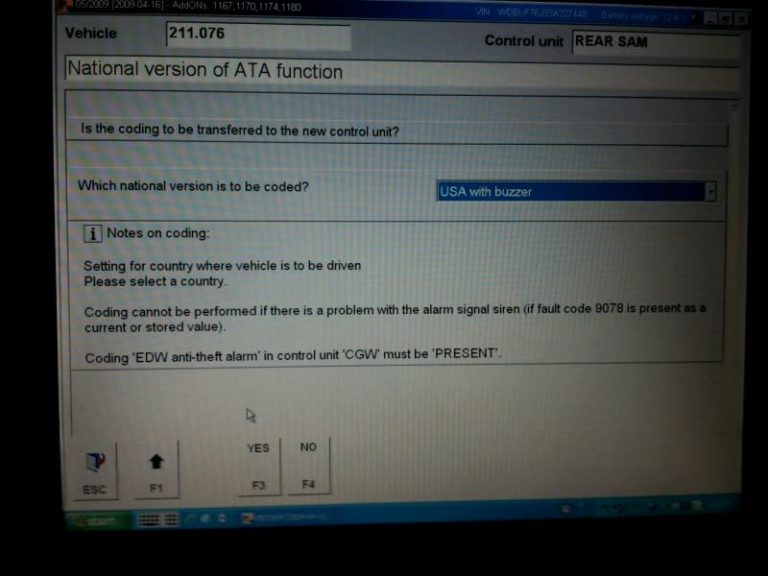
5) Then national version of ATA function
6) At this screen you will see a pull down menu with a list of different regions on it. The only ones you need to worry about are USA with buzzer and Netherlands. If you choose USA, i will give you three short quick beeps when you lock the car and one short when you unlock it. Netherlands will give you three longer beeps when you lock the car and one long when you unlock it. Personal preference on which one you like. Then hit F3.
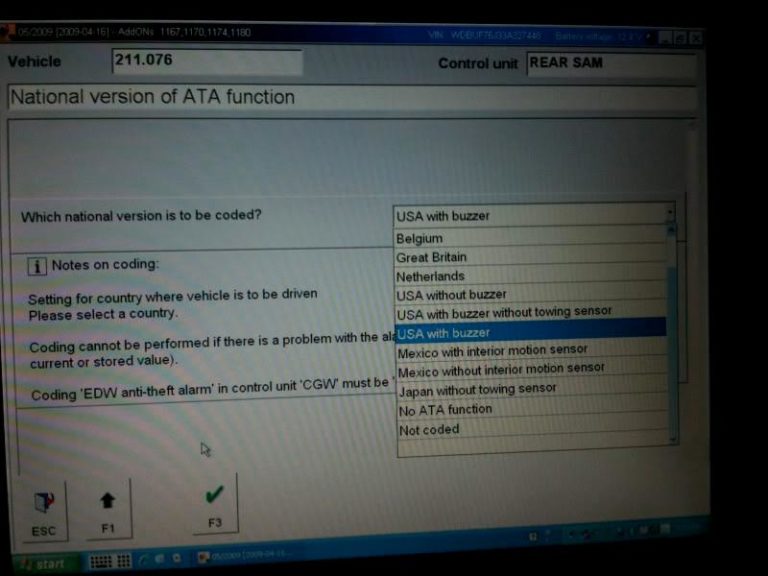
7) Then F3 (YES)
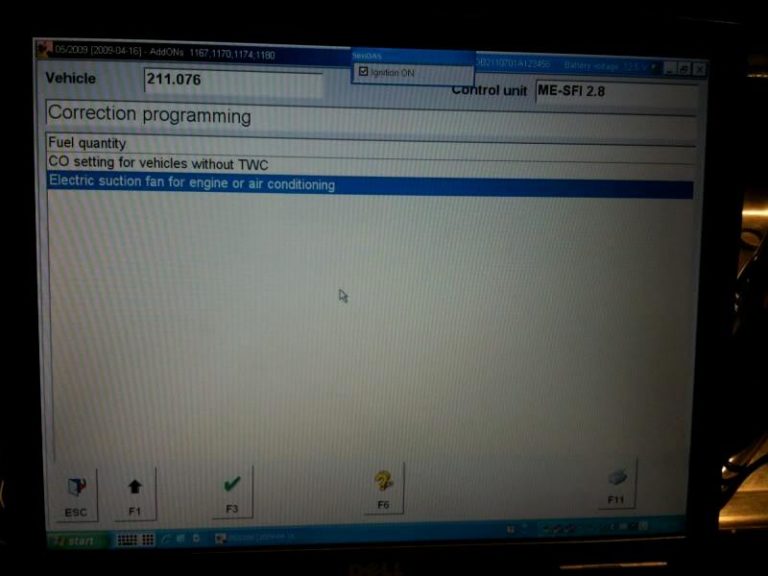
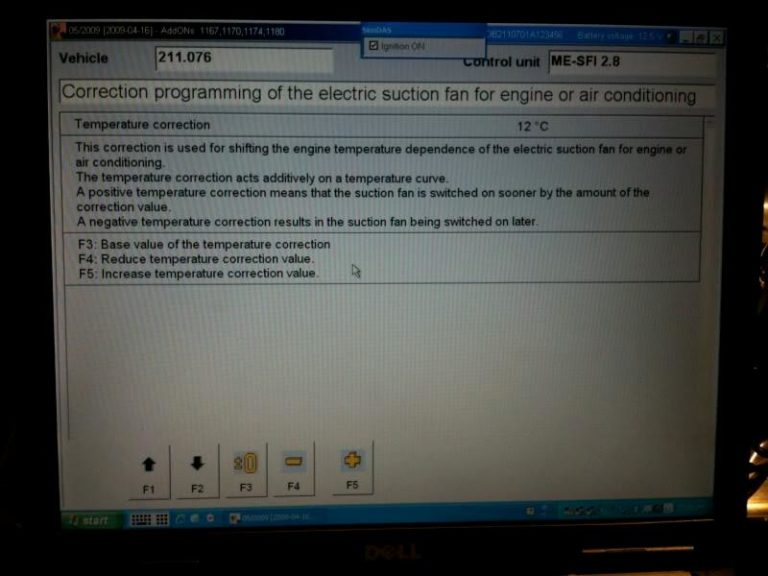
Allow the fan to turn on earlier to cool the engine/supercharger:
First go to Control Units 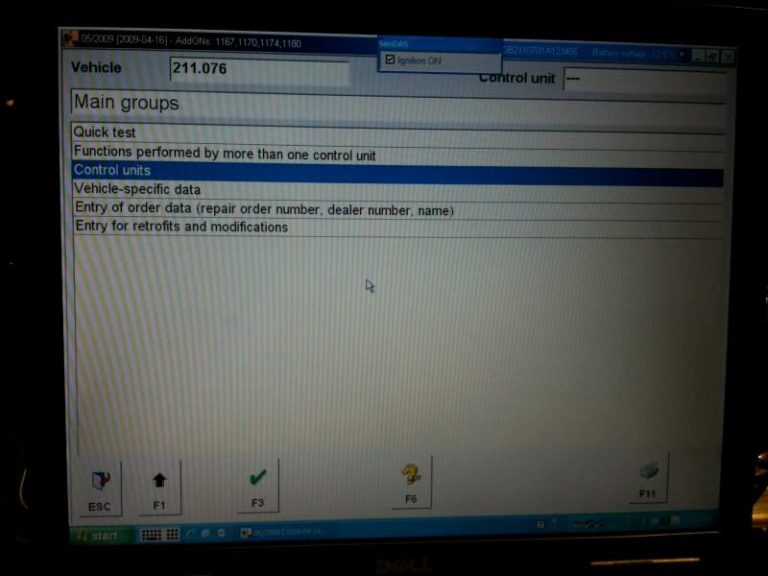
Then Drive
Then ME 2.8
Then Control Unit adaptations
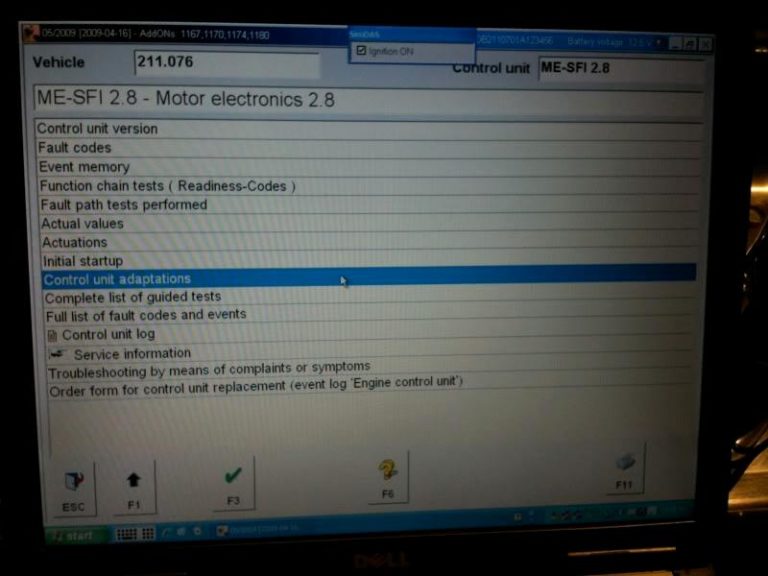
Then Correction Programing
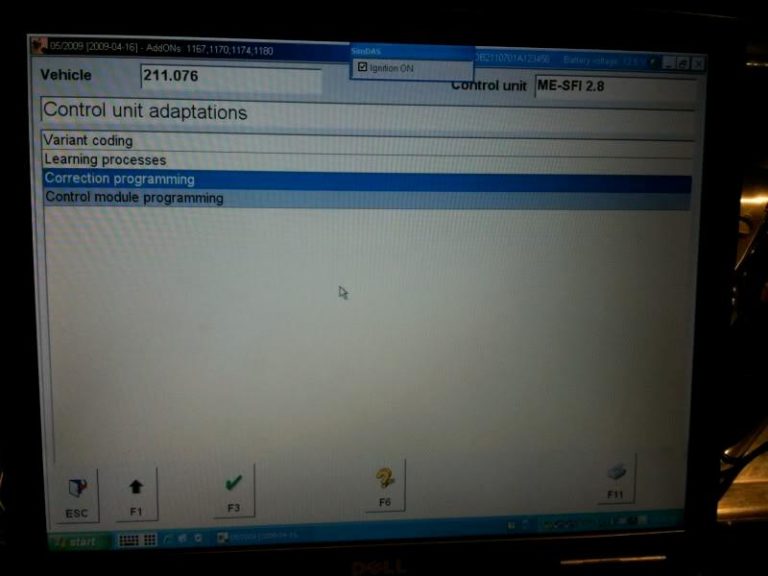
Then Electric Suction Fan

Then Hit F5 until it changes to -10 and hit F2
Activate Remaining fuel display in Instrument Cluster:
KeyLess Go Key reminder off
Go into the CGW and change KG to “Not Fitted”. It will still work. You will not get the annoying reminder beeps.
The Instrument Cluster will not turn red if you are at a stop, while in gear, and press the KG button like it does
now (telling you to put the car in Park). If your car is a wagon, the hatch will not open. That’s the only ill effects.
I know it seems petty but got to be very annoying.
Misc. Settings:
TeleAid Delete: Control units > ICM > Codings and adaptations > Special Equipment > TELE AID (set to “NOT PRESENT” and download to instrument cluster).
To enable cornering lights:
Body->SAM-F->CONTROL UNIT ADAPT -> READ CODING AND CHANGE…
Set Turning Lamps to PRESENT
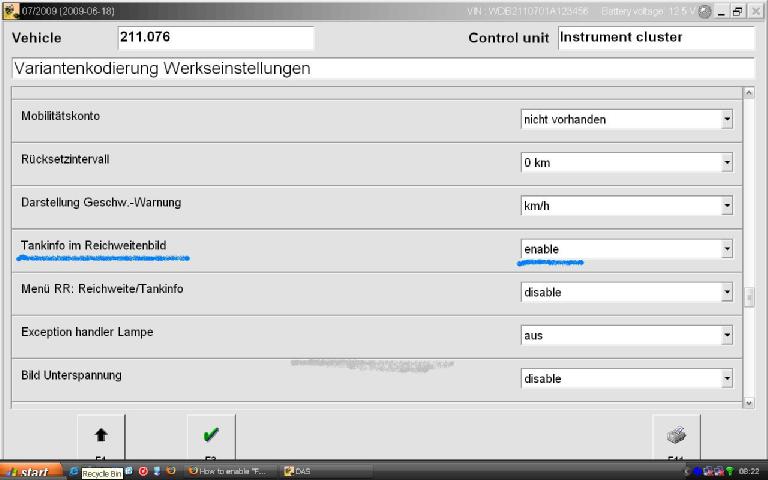
To enable tank content remaining (gallons left):
Inf & Comm -> Instr. Custer -> Diag. to Plant Spec. -> Control Unit Adapt. -> Variant Coding -> Read Coding
and change….
Set TANKINFO in REICHWEITENBILD to ENABLE
– You then need to reset the “kombiinstrument” (reboot)
Reset in DEV: Steuergeraet Resetten (PowerON-Modus) (FN_Reset_SG_Power_ON)
Some reading led me to find some sites say to also enable: Menu RR: Reichweite/Tankinfo
But mine works without so I didn’t enable this second one…
To enable flashing brake lights on emergency braking (missing on my SAM)
Control Units -> Body -> Rear SAM -> Dev. Data -> Control Unit Adapt. -> Control Unit Adapt. (Variant Coding)
Scroll to: Parameter Notbremsung, in the submenu you will have two more options: select zugelassen (enable)
Think the first choice is flashing brake and second is hazard lights, enable one or the other or both…
Enable Date in the Cluster (I’ve yet to do this one)
Control Units -> Inf. & Comms. -> IC – Instr. cluster -> Diag. to plant spec -> Control unit adapt. -> Control unit
adapt. ( Variant coding ) -> Variantkodierung Werkseinstellungen: Set “Datumsanzeige Grundbildebene” to aktiv.
(active)
– Then reboot the cluster
Change Speed limiter:
Log on to DAS, connect to the car, select:
Control Units -> Drive -> ME-SFI 28 -> Development Data.
Then select the Control Unit Adaptations -> Explizite Kodierung
R230 Disable TPC Tire pressure monitor STAR:
So if you ever took your car to the shop to disable that annoying tire pressure monitor light on the dash and they
told you they couldn’t show them the steps.
1.Connect xentry to the car ignition on
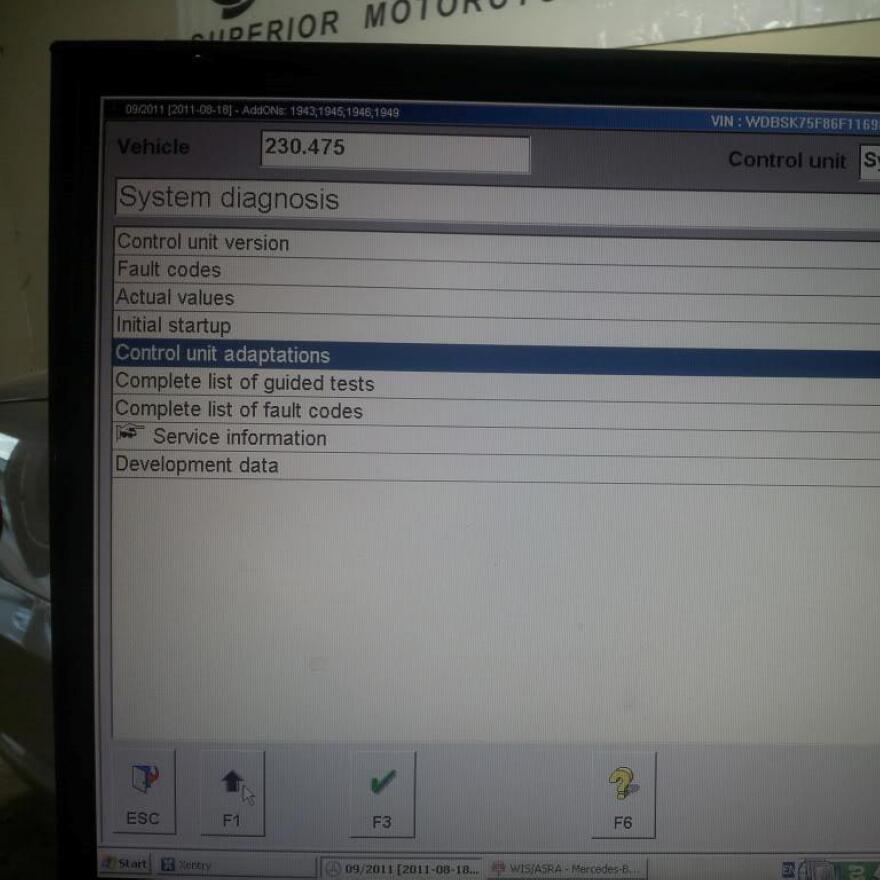
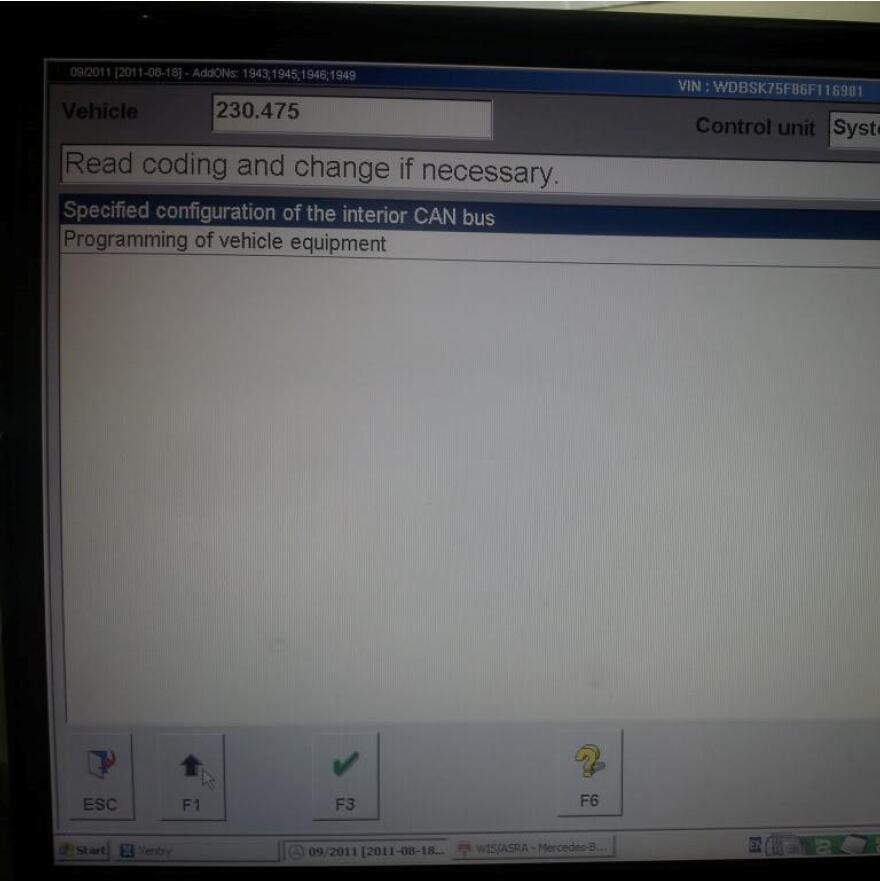
2.System Diagnosis ( Control Modules > Body > System Diagnosis )
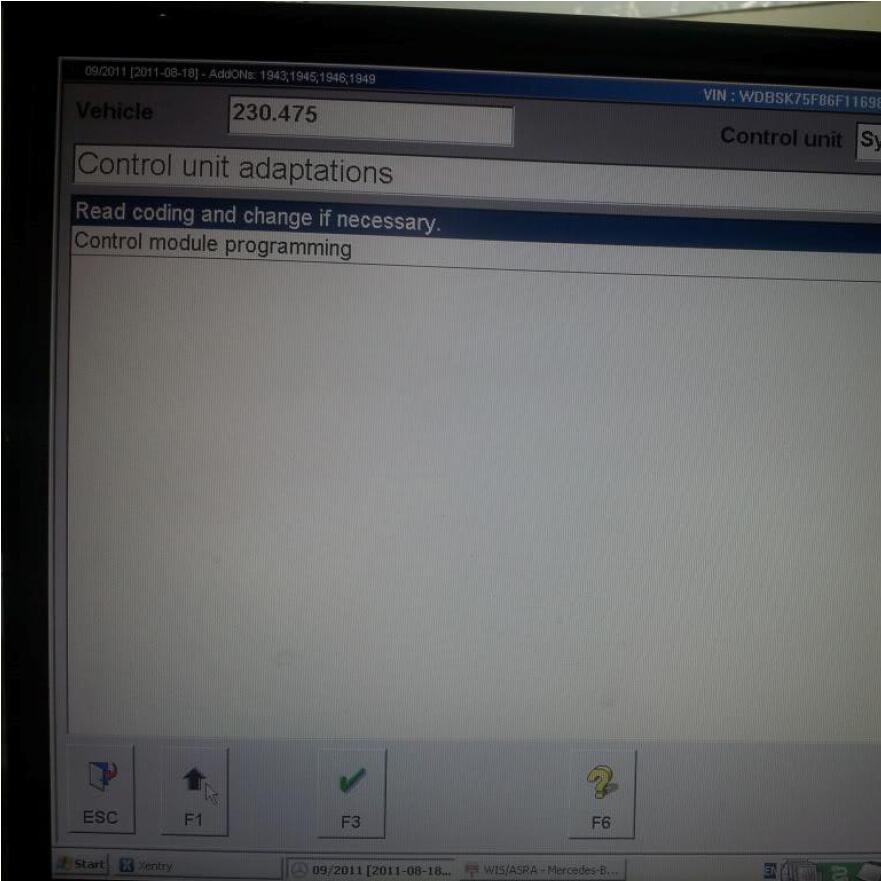
3.Control Unit Adaptations
4.Read Coding and change if necessary
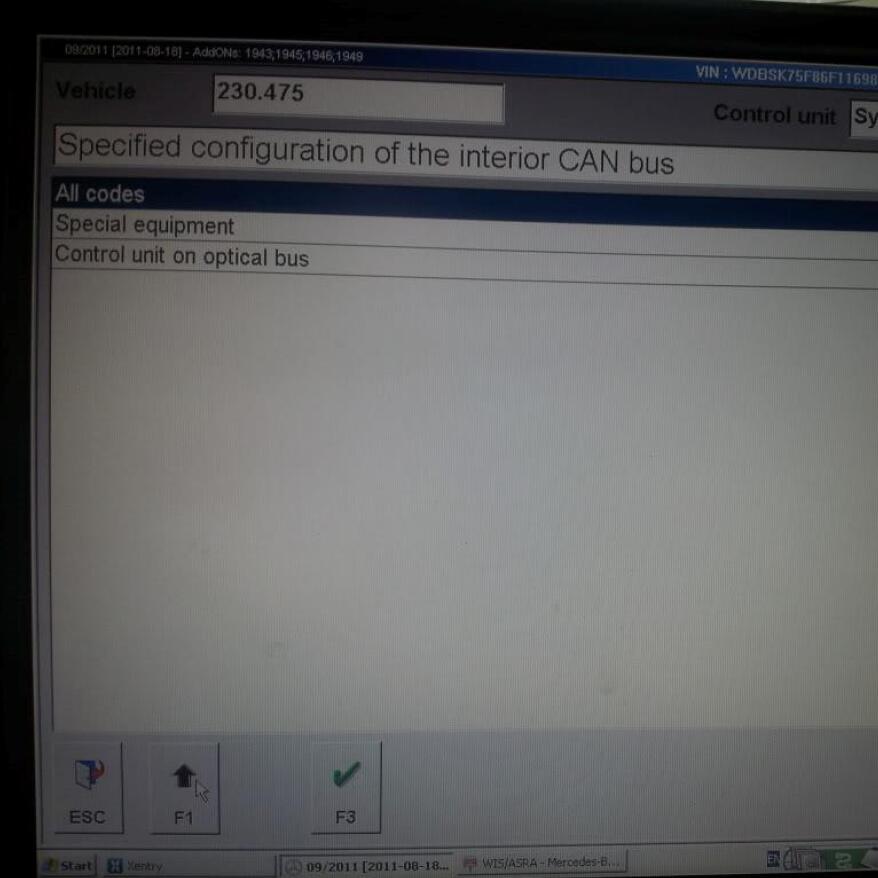
5.Specified Configurations
6.All Codes
7.Choose TPC (already disabled)
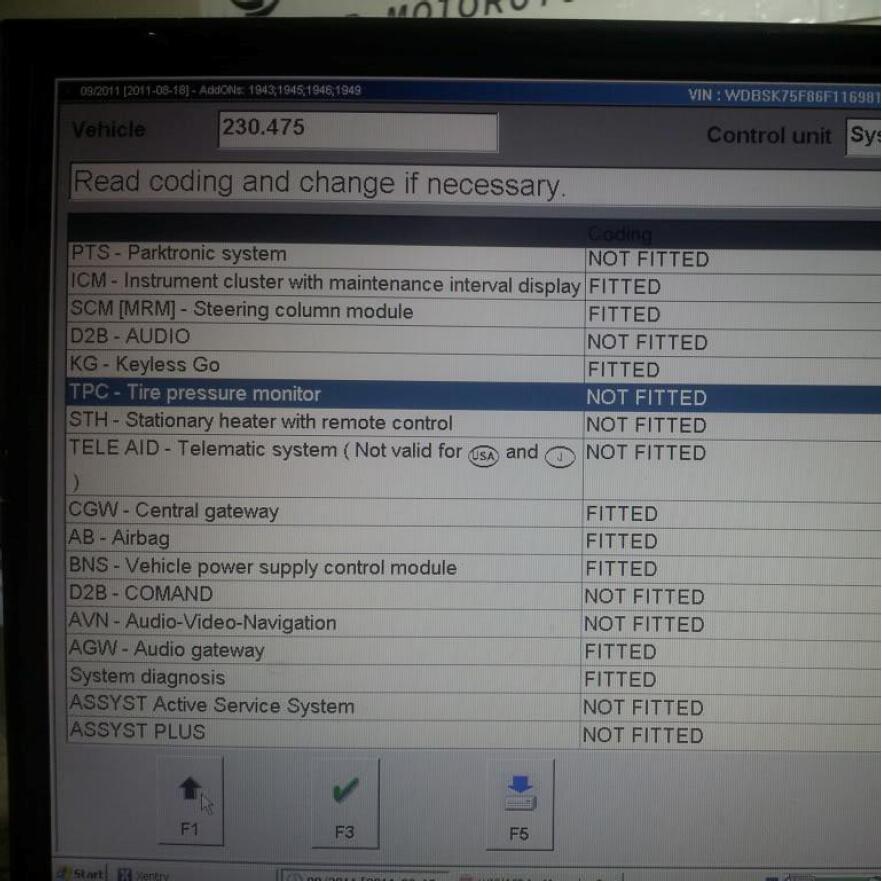
8.Choose not fitted or fitted if you were trying to enable
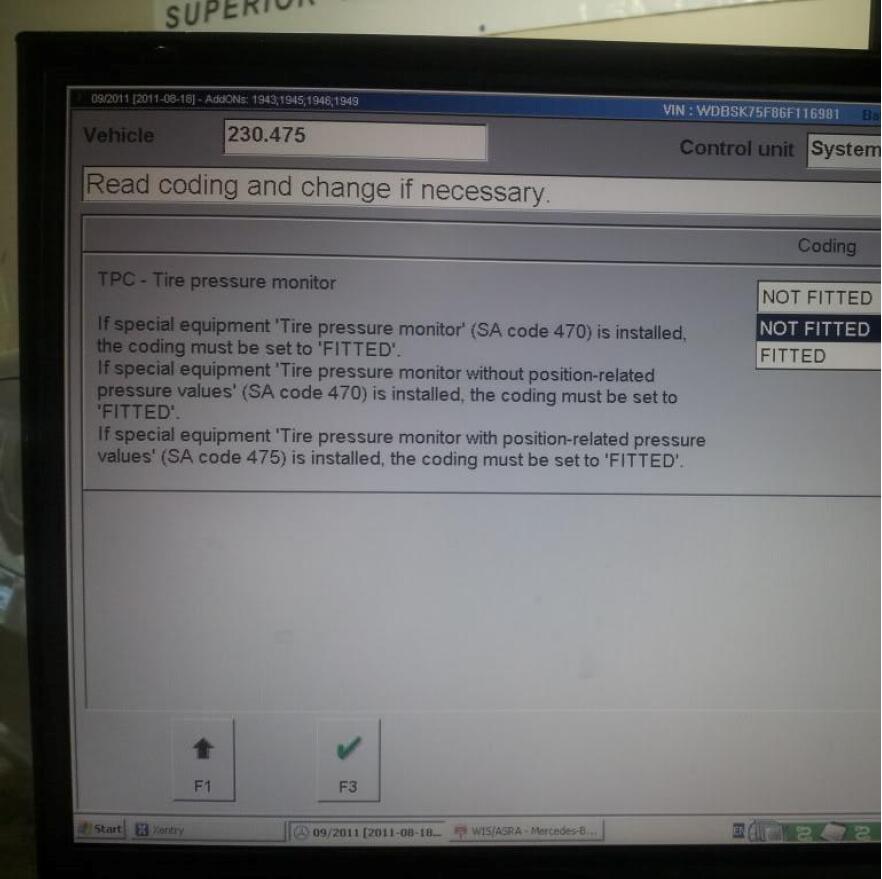
Enjoy!